Starting a home-improvement project can feel intimidating when every tutorial seems to involve power tools, technical vocabulary, and someone confidently knocking a hole through a wall.
You may want to improve your home, but you probably do not want your first project to end with an expensive repair bill. Fortunately, plenty of DIY jobs that beginners can safely tackle require only basic tools, patience, and careful preparation.
Small projects such as repainting a wall, assembling furniture, replacing existing handles, and filling nail holes can improve a room without involving complex plumbing, electrical systems, or structural work.
The key is choosing low-risk jobs and respecting your current skill level. Read instructions, wear suitable protection, keep the work area organised, and stop when something does not look right.
DIY confidence grows through manageable successes. Begin with a project you can complete in an afternoon, learn from the process, and save complicated renovations for qualified professionals.
Start With a Low-Risk DIY Project
A beginner-friendly project should be easy to reverse or repair when a mistake happens. Painting the wrong shade is inconvenient, but accidentally cutting into an electrical cable is dangerous.
Choose jobs that do not involve gas lines, fixed electrical wiring, structural walls, roofing, or major plumbing. It is also sensible to avoid any task that requires working at significant height or using unfamiliar high-powered equipment.
Before beginning, read the full product instructions rather than learning each step as you go. Check that you have enough time, suitable tools, ventilation, and a clear space to work.
Renters should also review their tenancy agreement or ask the property owner before making permanent changes. Removable upgrades may be a better option when drilling, painting, or replacing fixtures is restricted.
Assemble Flat-Pack Furniture Carefully
Flat-pack furniture is a useful first DIY project because the materials, hardware, and instructions are usually supplied together. It teaches you how to identify fasteners, follow diagrams, measure alignment, and use simple hand tools.
Open the package in a clear area and group similar screws, bolts, and fittings together. Compare every component with the parts list before starting, as discovering a missing bracket halfway through assembly is extremely frustrating.
Tighten connections gradually rather than forcing one screw as far as possible immediately. Over-tightening can damage particleboard, strip a screw head, or pull components out of alignment.
Tall bookcases, wardrobes, and chests of drawers may need to be secured to a wall. The US Consumer Product Safety Commission advises anchoring furniture to reduce tip-over risks, particularly in homes with children.
Use a suitable anchoring system and follow the manufacturer’s installation instructions carefully.
Fill Small Holes and Repair Minor Wall Marks
Small nail holes, shallow dents, and minor surface cracks can make an otherwise tidy wall look neglected. Repairing them is usually manageable with lightweight filler, a filling knife, fine sandpaper, and matching paint.
Clean away loose dust before applying the filler. Use a small amount, smooth it slightly above the wall surface, and allow it to dry for the period stated on the packaging.
Sand gently until the patch feels level, then remove the dust before painting. It is better to apply two thin coats of paint than one thick layer that dries unevenly.
Be more cautious in older homes. Sanding or disturbing painted surfaces in homes built before 1978 in the United States can create hazardous lead dust when lead-based paint is present.
The EPA recommends checking for lead and following lead-safe practices before disturbing older painted surfaces. Regulations and dates vary between countries, so check local guidance.
Paint a Wall or Refresh a Small Room
Painting is one of the most noticeable beginner home-improvement projects. It can brighten a room, cover everyday marks, and change the mood of a space without requiring advanced construction skills.
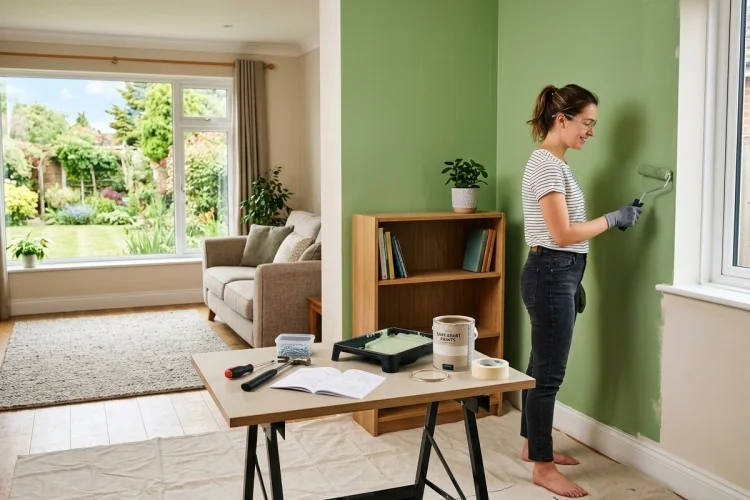
Preparation usually takes longer than the painting itself. Move furniture away from the wall, cover floors, clean dirty surfaces, remove loose paint, and protect trim with painter’s tape when needed.
Begin with a small area such as an alcove, hallway, or feature wall. Use paint designed for the surface and location, and follow the instructions for drying time and additional coats.
Ventilation is important when painting indoors because paints and related products may release volatile organic compounds.
The EPA recommends opening windows, using fans that exhaust outdoors where possible, and following the manufacturer’s ventilation and safety directions.
Stop if you discover crumbling material, widespread dampness, extensive mould, or an unknown textured coating. These problems may need investigation rather than another layer of paint.
Replace Existing Handles and Simple Hardware
Changing cabinet knobs, drawer pulls, and other non-electrical hardware is an easy way to update furniture or a kitchen. The safest method is to use the existing holes so you do not need to measure and drill new ones.
Remove one handle and check the distance between its screw holes before buying replacements. Keep the original hardware until the new pieces are installed successfully.
A manual screwdriver is usually enough. Support the handle with one hand while tightening from the other side, and stop once it feels secure. Excessive force may crack the cabinet surface or damage the thread.
Beginners can also replace straightforward items such as a toilet seat when the fittings are accessible and the new model matches the toilet. Turn the relevant fittings carefully, follow the supplied instructions, and avoid forcing corroded parts.
Do not treat switches, outlets, light fittings, or hardwired appliances as ordinary hardware. Electrical work can cause shock, burns, or fire when completed incorrectly, and some projects legally require a licensed electrician.
Try Removable and Non-Structural Upgrades
Not every DIY project needs to involve permanent construction. Removable upgrades can transform a room while keeping the level of risk relatively low.
Peel-and-stick wallpaper, removable window film, adhesive hooks, furniture covers, and tension-mounted curtain rods can add colour or function without major tools. Always check weight limits and test adhesive products in a hidden area because some can damage paint when removed.
Adhesive weatherstripping can reduce small draughts around suitable doors and windows. Clean and dry the surface first, measure the strip carefully, and make sure the finished installation does not prevent the window or door from closing securely.
You can also improve storage by adding freestanding shelving, baskets, drawer dividers, and over-door organisers. These projects are simple, but heavy shelving should remain stable and tall units should be anchored when required.
Avoid drilling blindly into walls. Pipes, cables, and other utilities may be hidden behind the surface, and wall materials require different fixings. When you cannot confidently identify the construction and a safe fixing point, use a removable alternative or hire someone experienced.
Complete Basic Maintenance Jobs
Some of the most useful beginner DIY tasks are small maintenance jobs that prevent daily annoyances from getting worse.
A squeaky interior hinge may only need cleaning, tightening, or a small amount of suitable lubricant. Protect the surrounding surface, apply the product sparingly, and wipe away any excess.
Loose furniture screws can also be tightened with the correct screwdriver. Check chairs, tables, bed frames, and handles periodically, but do not keep turning a fastener that spins without becoming secure. That may indicate a stripped thread or damaged material.
Replacing felt pads beneath furniture is another simple project. Pads can reduce scratching and make chairs easier to move, but choose a size that fully supports the furniture leg.
Basic garden tasks, such as repainting a small planter, tightening a gate latch, or assembling a raised bed, can also be manageable. Outdoor electrical equipment, unstable fencing, large trees, and work close to overhead cables should be left to trained professionals.
Set Up a Safer Workspace
Even a simple project becomes riskier when the floor is covered with tools, packaging, and loose cables. Clear the area before starting and keep children and pets away from the workspace.
Wear eye protection when there is a risk of dust or flying material. Gloves may be useful for rough surfaces and chemicals, but they should not be worn around tools when the manufacturer warns that fabric could become caught.
Use each tool only for its intended purpose and inspect it before use. OSHA’s safety guidance stresses maintaining tools properly, keeping guards in place, and removing damaged equipment from service.
If you use a ladder or step stool, place it on a firm, level surface and keep your body centred between the sides. Do not stand on chairs, boxes, or unstable furniture to reach higher areas.
Cleaning at the end is part of the project. Collect sharp objects, close chemical containers, remove dust safely, and store tools where they cannot be reached by children.
Know Which DIY Jobs to Leave to Professionals
Knowing when not to continue is one of the most important DIY skills. Stop when the work involves a safety system, hidden damage, specialist testing, or legal requirements you do not understand.
Electrical rewiring, gas appliance work, roof repair, foundation problems, structural alterations, and major water leaks generally need trained professionals.
You should also seek expert help when a project reveals burned wiring, strong gas smells, significant movement in a wall, or water close to electrical equipment. Older building materials may contain asbestos.
The EPA recommends using a trained and accredited professional to inspect or sample suspected materials before renovation work disturbs them. Possible materials include some older floor tiles, ceiling products, insulation, and pipe coverings.
Do not continue simply because you have already purchased supplies. Calling a professional early is usually cheaper and safer than paying someone to repair extensive damage afterward.
Beginner DIY should build confidence rather than test how much risk you are willing to accept. Start with low-risk jobs such as assembling furniture, filling small wall holes, painting, replacing existing handles, or adding removable storage and décor.
Prepare the area, follow every product instruction, use tools correctly, and protect yourself from dust, fumes, and falling objects.
Most importantly, recognise the boundary between simple home maintenance and specialist work involving electricity, gas, structures, hazardous materials, or major plumbing.
Choose one small project this weekend and complete it carefully from preparation through cleanup. A neat paint repair or securely assembled shelf may seem modest, but it gives you the skills and confidence to approach your next home project more safely.