
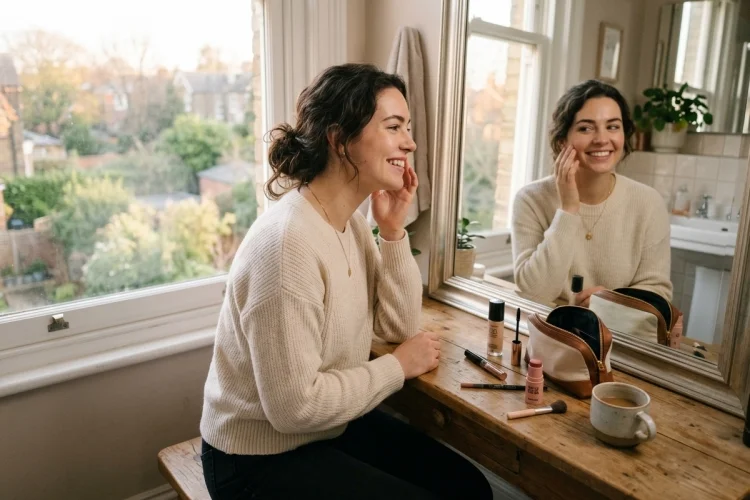
A natural makeup look sounds effortless, but it can easily turn into 30 minutes of blending, correcting, and searching for the eyebrow pencil that disappeared under the sink.
When you are getting ready for work, university, errands, or a casual lunch, that kind of routine is rarely practical. The secret is not learning how to apply makeup faster.
It is deciding which steps create the biggest visual difference and skipping anything that does not support your everyday look. Learning how to create a natural everyday makeup look in ten minutes means using light layers, simple techniques, and versatile products.
The aim is to make your complexion look fresh, add gentle definition, and bring some colour to your face without covering everything that makes your skin look real.
You do not need expensive cosmetics or professional-level skills. With a prepared makeup bag and a consistent order, ten minutes is enough to create a polished look that still feels comfortable and recognisably you.
Prepare Your Ten-Minute Makeup Kit
A quick routine becomes much easier when you are not choosing between 25 products every morning. Keep your everyday essentials together in a small makeup bag or an easy-to-reach section of your bathroom.
A practical kit might contain a skin tint or lightweight foundation, concealer, brow product, mascara, blush, lip colour, and powder if your skin becomes oily. You may also want one sponge and two brushes: one for complexion products and another for blush or powder.
Choose items that are easy to control. Products with sheer or buildable coverage are often faster to apply because small mistakes are less noticeable than they would be with very full coverage.
Multi-use products can also save time. A cream colour that works on the cheeks and lips, for example, removes one decision from the routine.
However, use products around the eyes only when they are specifically designed for that area. The FDA advises against applying cosmetics near the eyes unless the product is intended for eye use.
Start With Simple Skin Preparation
Natural-looking makeup usually sits better on skin that feels comfortable and hydrated. You do not need a complicated morning skincare routine, but applying makeup over very dry, oily, or irritated skin can make blending more difficult.
Begin with a gentle cleanse or rinse, depending on your skin’s needs. Follow with a lightweight moisturizer and allow it to settle briefly.
During the day, apply broad-spectrum sunscreen with SPF 30 or higher before your makeup. Dermatologists recommend placing sunscreen after other skincare products and underneath cosmetics.
Choose skincare textures that suit your complexion. A lightweight, non-comedogenic moisturizer may feel better on oily or acne-prone skin, while dry skin may benefit from a richer cream around flaky areas.
Primer is optional. Use it when it solves a specific issue, such as makeup separating around the nose or becoming shiny on the forehead. Adding primer automatically to every routine can waste time when your moisturizer already creates a smooth base.
Minutes One to Three: Even Out the Complexion
A natural base should make the skin look more even without completely hiding freckles, texture, or every small mark. Start with a small amount of tinted moisturizer, skin tint, light foundation, or another sheer complexion product.
Apply it mainly where you need it. This may include the centre of the face, around the nose, across the chin, or over areas of uneven tone.
Blend outward using clean fingers, a damp sponge, or a brush. Fingers are often the fastest option because their warmth can help spread lightweight products, while a sponge can soften visible edges.
Do not keep adding foundation simply because you can still see your skin. Natural makeup is supposed to look like skin rather than a perfectly smooth digital filter.
People who are prone to breakouts can look for products labelled “oil-free,” “non-comedogenic,” or “won’t clog pores.” These labels indicate that the formula is designed to be less likely to contribute to clogged pores.
Minute Four: Conceal Only Where Needed
Instead of layering concealer across large parts of the face, use small amounts in targeted areas. Apply a dot beside the inner corners of the eyes, around redness, or directly over a noticeable blemish.
Blend by tapping rather than rubbing. Tapping keeps more coverage in the area where you placed it, while aggressive rubbing can move the product away.
For under-eye makeup, avoid drawing a large triangle of heavy concealer unless you genuinely need that much coverage. One or two small dots can brighten the area while keeping the finish light.
The shade does not need to be dramatically lighter than your skin. A close match generally looks more natural and is less likely to create obvious pale patches in daylight.
Allow some features to remain visible. A faint shadow, small blemish, or patch of pigmentation does not automatically need another layer.
Minute Five: Add Soft Definition to the Brows
Brows frame the face, but an everyday look rarely requires drawing an entirely new shape. Brush the hairs upward and outward to see where natural gaps appear.
Use a fine pencil, tinted brow gel, powder, or pomade to fill only those areas. Short, light strokes usually look more like real hairs than one solid line.
Concentrate definition through the arch and tail while keeping the front softer. A heavily drawn inner brow can make the entire look appear stronger than intended.
For very quick mornings, a tinted brow gel may be enough. It adds a little colour, controls the hairs, and removes the need for detailed pencil work.
Choose a shade close to your natural brow colour rather than automatically selecting the darkest available option. Softer colour is generally more forgiving when you are applying makeup quickly.
Minutes Six and Seven: Wake Up the Eyes
You do not need a complicated eyeshadow palette for natural everyday makeup. Curling your eyelashes and applying mascara can create enough definition for many people.
Place mascara mainly at the roots, then pull the brush toward the tips. One light coat gives subtle definition, while a second coat can be added to the outer lashes when you want a slightly more lifted effect.
Brown mascara can look softer on light lashes, although black works well across many hair colours and skin tones. The right choice is the one that creates the level of contrast you prefer.
For additional definition, press a brown pencil close to the upper lash line. Keep the line thin and slightly soften it with a clean brush or fingertip.
Avoid sharing mascara, eyeliner, or other eye products. The FDA warns that shared cosmetics can transfer germs, and it recommends discarding eye makeup after an eye infection because the product may have become contaminated.
Minute Eight: Bring Colour Back With Blush
Blush can make a simple complexion look more awake in seconds. Cream and liquid formulas often blend quickly and create a fresh finish, while powder can be easier to control on oily skin.
Apply a small amount to the cheeks, then blend upward rather than creating a harsh circle of colour. Begin with less than you think you need because adding product is easier than removing it.
The perfect blush shade does not need to follow a complicated rule. Muted pink, peach, rose, berry, or warm brown can all look natural depending on your skin tone and preference.
You can also use the remaining product on your brush or fingers across the bridge of the nose, but keep the effect subtle. The goal is a gentle connection between the areas, not an obvious stripe.
Bronzer and highlighter are optional. Add them only when you have time and enjoy the effect. A successful everyday look does not need every category sold at a beauty counter.
Minute Nine: Set Only the Areas That Need It
Powder can improve wear time and reduce shine, but covering the entire face heavily may remove the natural finish you just created.
Use a small brush or puff to press a light layer onto the forehead, sides of the nose, chin, or any area where makeup tends to move. Leave the cheeks less powdered when you prefer a fresher appearance.
Dry skin may need very little powder or none at all. Combination skin can be set only through the T-zone, while oily skin may benefit from a wider but still light application.
Setting spray is another optional step. It may help reduce a powdery appearance, but it is not essential for a basic ten-minute routine.
Carry blotting paper or a clean tissue when shine appears later. Removing excess oil before adding more powder can prevent makeup from becoming thick or uneven.
Minute Ten: Finish With an Easy Lip Product
Your final step should be something you can apply without intense concentration. Tinted lip balm, sheer lipstick, lip oil, or gloss can add colour while keeping the result relaxed.
Choose a shade close to your natural lip colour for the easiest everyday finish. Rose, peach, pink-brown, berry, and caramel tones can all work, depending on your colouring.
For slightly more definition, trace the lip line lightly with a pencil and soften it inward using a fingertip. Avoid leaving a sharp border unless that is the style you want.
A multi-use cheek and lip colour can make the whole face look coordinated. Just make sure the product is labelled for use on both areas.
Keep your chosen lip product in your bag rather than expecting the first application to last perfectly through coffee, meals, and conversation. A quick touch-up is easier than trying to make a lightweight formula behave like permanent paint.
Adapt the Routine to Your Skin Type
For dry skin, use hydrating base products, apply powder sparingly, and avoid repeatedly layering makeup over flaky areas. Pressing products into the skin generally works better than scrubbing them across dry patches.
For oily skin, choose lightweight, oil-free products and set the areas that become shiny. Applying extremely heavy matte foundation can sometimes make the complexion look less natural than using light coverage with strategic powder.
Sensitive skin may benefit from fragrance-free products and a shorter ingredient list. Cosmetics can trigger irritant or allergic contact reactions in some people, so stop using a product that repeatedly causes itching, swelling, burning, or a red rash.
For acne-prone skin, avoid picking at blemishes before applying concealer. Use a light touch and keep applicators clean to reduce irritation.
The routine should fit your real skin rather than forcing every face into the same viral technique.
Keep Your Makeup and Tools Clean
Fast makeup should still be hygienic. Wash your hands before applying products with your fingers and avoid sharing cosmetics or applicators with other people.
The American Academy of Dermatology recommends cleaning makeup brushes every seven to ten days because brushes collect makeup residue, oil, dirt, and microorganisms.
Sponges used for complexion products may need cleaning more frequently, particularly when they remain damp.
Keep product containers closed when they are not in use, and replace cosmetics when their smell, colour, or texture changes. Writing the opening date on mascara and other short-lived products can make their age easier to track.
Remove your makeup before bed using a gentle remover or cleanser. Dermatologists advise cleansing without aggressive scrubbing, even when removing long-wearing cosmetics.
Creating a natural everyday makeup look in ten minutes is mostly about simplifying your choices. Prepare the skin, apply light coverage, conceal selectively, define the brows and lashes, add blush, control shine, and finish with an easy lip colour.
You do not need to use every product category or hide every visible feature. Natural makeup works best when the layers remain light and the result still resembles your real skin.
Prepare your everyday makeup bag tonight and remove anything you rarely use. Tomorrow morning, follow the same order and notice which steps make the biggest difference. With a little repetition, the routine will become faster, easier, and far less stressful.